
Microsoft PowerPoint
Use Slide Titles for Structure (Equivalent to Headings)
Slide titles behave like headings in other document types. Because they’re essential to the document structure, each slide should have a title, and it should be listed as a Title in the template, not just another text box with altered font styles.
Titles should also be unique and descriptive so that you can get the gist of the presentation from the outline view.
- Use the Click to add title field on every slide.
- Other fields can be left empty, but not the title field.
- Even if the entire slide is covered by an image, have a title behind it.
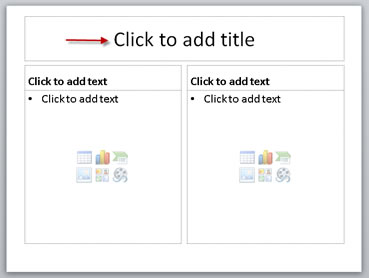
Use Built-in Slide Layouts
Microsoft’s built-in slide layouts provide a correct reading order that screen reading software can detect.
Once you’ve selected your layout,
- Use only the fields included in the slide layout
- Avoid drawing your own text boxes to add more content. If you do add text boxes, make sure to check the slide reading order.
- You can leave fields unused except for the title field
To choose a slide layout, use either the New Slide drop-down menu on the Home ribbon, or to change the layout on the current slide, select Home, Layout.
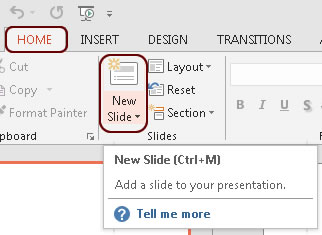
Select the layout that fits best with your content:

Make Links Descriptive
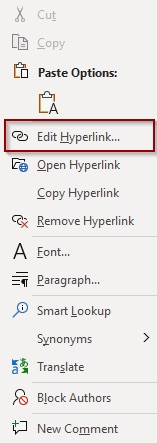
To add descriptive link text in Microsoft Office, first select the link. Right-click on the link and select Edit Hyperlink.
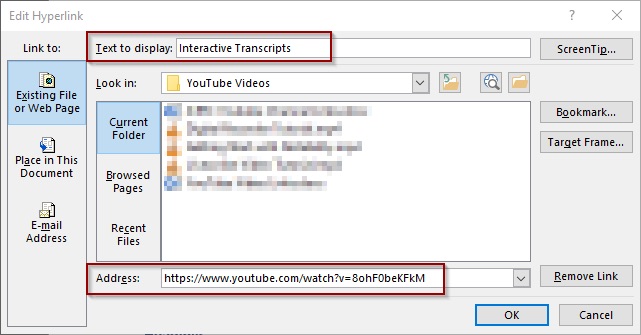
- Type the descriptive text in the Text to Display field.
- Leave the url in the Address field. This is the link that will be followed.
Ensure Sufficient Color Contrast
Provide Basic Image Descriptions
Right-click on the image, then select Edit Alt Text from the context menu.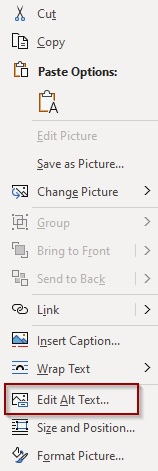
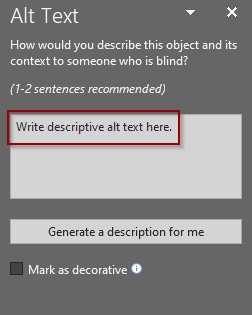
A sidebar will open on the right side of the document. Add your descriptive alternative text in the text box.
Designate a Header Row on Tables
To set the header row on a table in PowerPoint, select the Design tab in the ribbon under Table Tools.
Check the checkbox titled Header Row at the top left of the Design ribbon. If the table also has a header column, check the box titled First Column.

Adjust the Reading Order
It’s essential to check the reading order of slides if
- Files were started in older versions of PowerPoint
- You’ve drawn your own content boxes on a slide
- You’re creating your own slide layout in a Template. You need to set the reading order in the master template, otherwise every slide based on that template will be out of order.
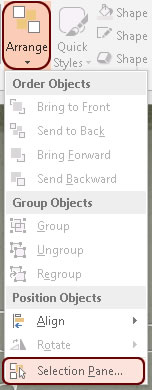
On the Home Ribbon, select the Arrange drop-down menu. Click on Selection Pane at the bottom of the Arrange menu.
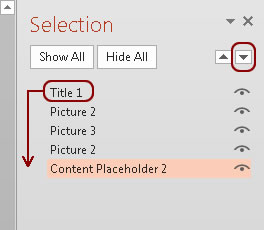
The Selection Pane will appear on the right side of the document. This lists each element on the slide and the order in which it will be read.
Important: The reading order starts at the bottom and moves upwards.
Select an element in the Selection Pane to see the corresponding element highlighted in the slide.
In the following screenshot, the Title will not be read first, since it is not at the bottom of the list. Content Placeholder 2 will be read first.
To fix the reading order, select Title 1 and click the down arrow to move it to the bottom of the list.
Check to make sure that each remaining item is in a logical reading order.
Tip: Instead of fixing the reading order, transfer your content to a fresh document made with an accessible template and use the built-in slide layouts.
Simplify Tables
Provide Table Data for Charts and Graphs
Provide Long Description for Complex Images
Microsoft Accessibility Checker
To open the built-in Accessibility Checker, go to the Review Ribbon and select Check Accessibility.
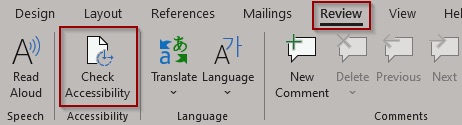
This opens a sidebar on the right side of the document with a list of issues discovered. Clicking on a listed item takes you directly to the location that needs to be fixed.
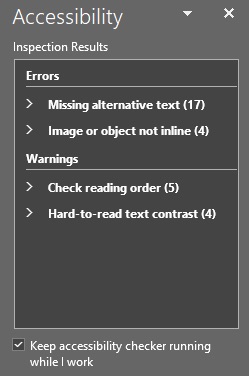
You can also monitor accessibility as you continue authoring the document. At the bottom of the page next to the page count is an ongoing accessibility status update.

Note that there are some errors in the checker that we don’t cover on this website. You can learn even more about accessibility by resolving all the issues discovered using the Accessibility Checker. That’s why we consider this an advanced step.