
Canvas Tools – Ally, TidyUp, UDoIT
Add TidyUp to the Course Menu
- Navigate to the Settings menu at the bottom of the course menu:
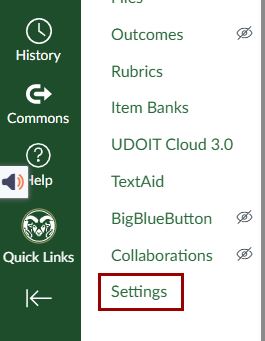
- Click on the Navigation tab in the Settings menu:
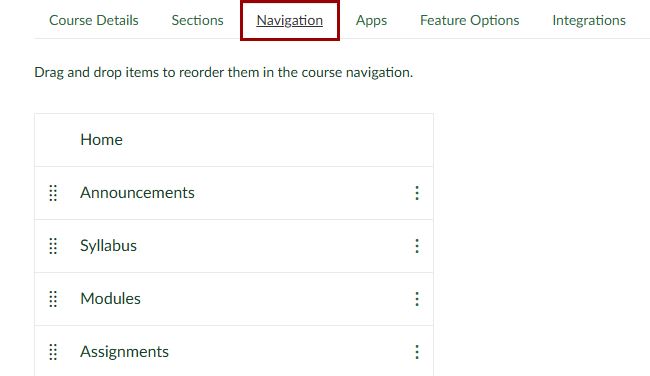
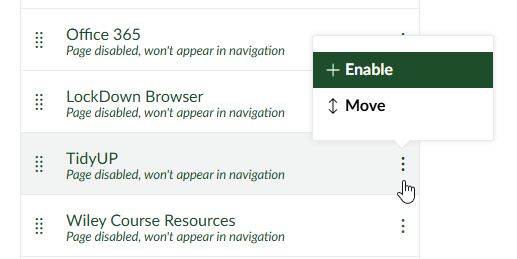
- Scroll down to find TidyUp in the disabled items. Click on the 3-dots menu next to TidyUp and select Enable.
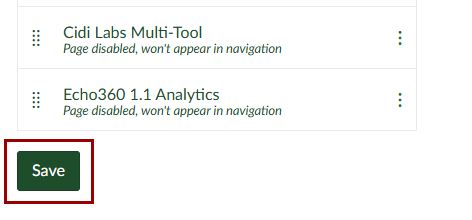
- Scroll to the bottom of the page and click the Save button.
Start a Course Scan
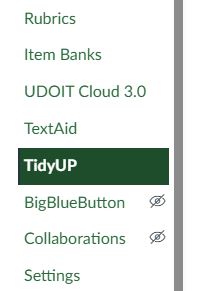
- Click on TidyUp in the course navigation menu.
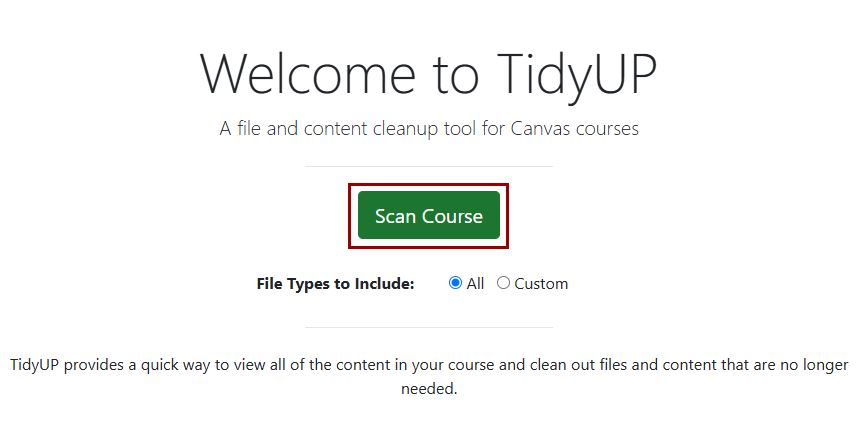
- Click on the Scan Course button.
Filter the File View
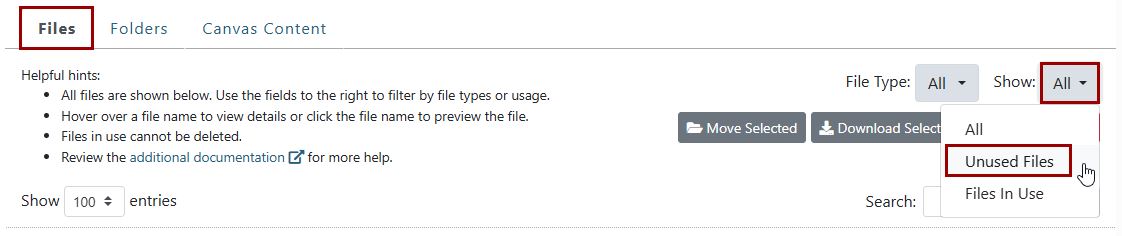
Once the scan is complete, filter the results by changing the Show dropdown menu. If you are removing obsolete files, filter by Unused Files.
Download then Delete Files
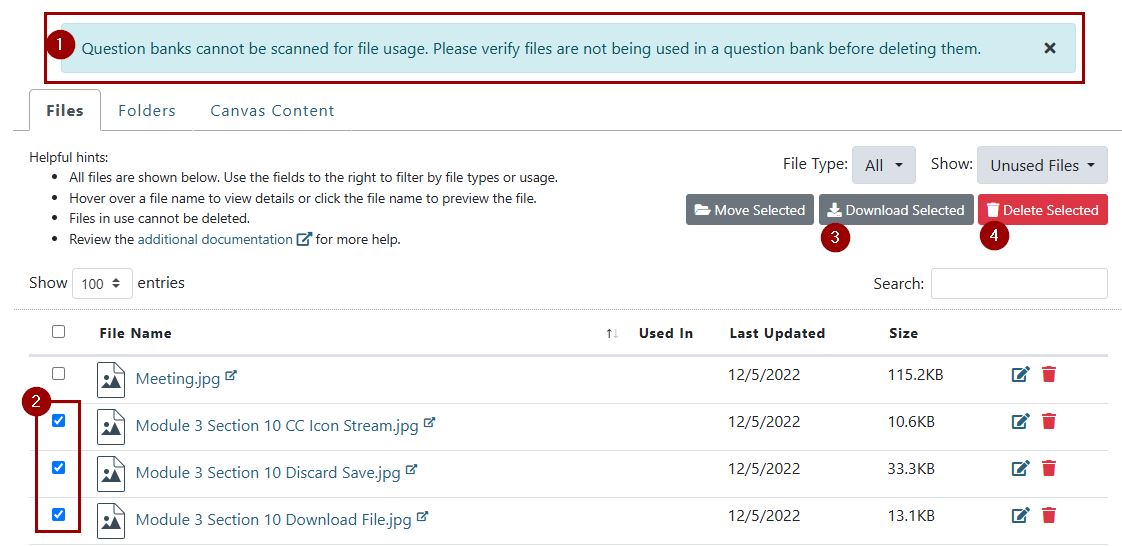
In the resulting list of unused files, you can delete one at a time using the trash icon next to the file. You can also use the checkboxes to select multiple files at once. Use the Download Selected button to make a backup before using the Delete Selected button to remove the files.
Note: If you have files in question banks, use caution. TidyUp does not have access to scan these files. They may actually be in use.
How to Read the Scores
Ally uses dials for low, medium and high-scoring content.

Although you will see a score for your course, our primary purpose as a campus is to focus on Universal Design Goals from the Electronic Accessibility Rubric. Following the rubric may not result in a perfect score in Ally. For example, Ally will provide the minimum needed for a scanned PDF, but the score will not improve.
View Instructor Feedback Within a Page
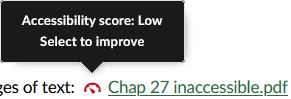
Instructor feedback is available directly within the course pages. Each type of content checked by Ally has an accessibility gauge next to it. Hovering over the icon will tell you the score, and clicking on it will take you to the detail page for fixing that content.
Video: Instructor Feedback
View a Full Course Report
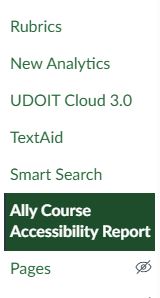
You can also view and fix issues course-wide via the course report in course navigation. Select Ally Course Accessibility Report in the course menu:
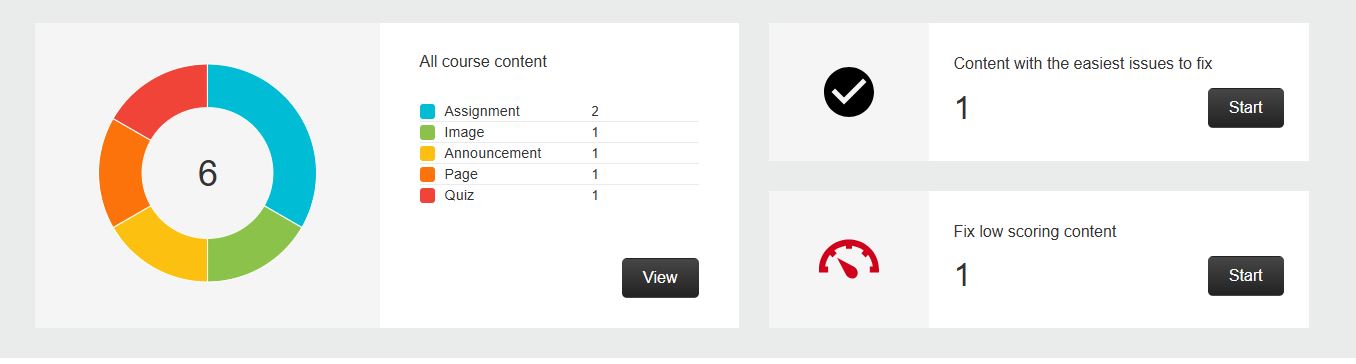
This brings up the dashboard view for the course. The pie chart shows all of the types of course content. The next sections show content with the easiest issues to fix as well as low-scoring content. These are easy ways to make the greatest impact in the course.
Video: Course Report
Remove Unused Content with TidyUp
Start a UDOIT Scan
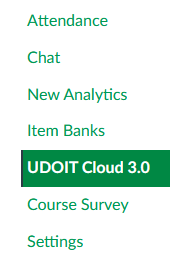
Click on the UDOIT Cloud 3.0 link in your course navigation. This automatically starts a course scan.
Fix Image-Only PDFs
The top priority issue in UDOIT is fixing image-only PDF files. View the video tutorial or scroll down for the written version on using UDOIT to recognize text in PDFs.
Video: Fixing Scanned PDFs in UDOIT
Written Tutorial
To recognize the text within PDFs in Canvas:
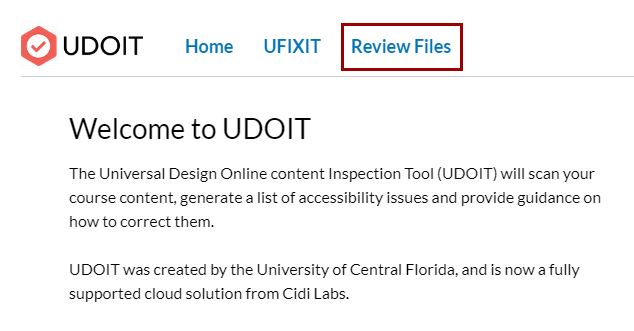
- Click on the “Review Files” tab in UDOIT.
- Click the “Scan Now” button to make sure all files have been scanned.
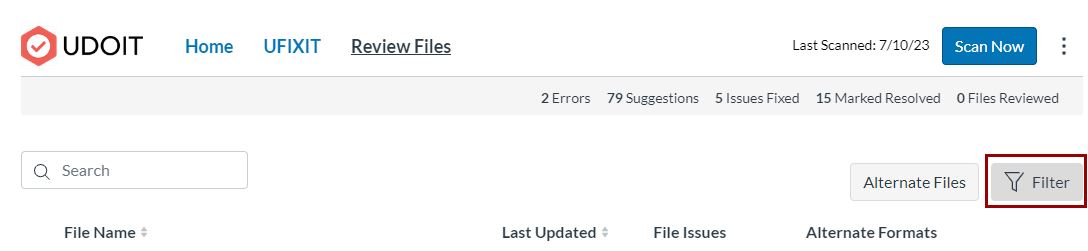
- If you have a lot of files, filter the results to see the top priority PDF files that need to be fixed. Click on the “Filter” button.
- Select “PDF” under file type, and/or “Scanned File” under Issues.
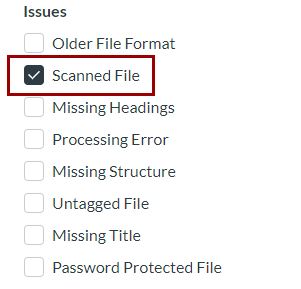
- Select “PDF” under file type, and/or “Scanned File” under Issues.
- Click the “Review” button to fix an individual file.

- Under Alternate Formats, select “Request” next to Auto Tagged PDF.
- It may take a while to convert the file. You can close this window and it will continue converting the file. Just remember to go back and replace the original once it’s completed (click on Review again).
- Note that you can also convert to other formats, including html, ePub, and mp3. You can provide multiple ways to access the content by linking these in your course.
- For someone who needs fully accessible PDFs, the auto tagged PDF will not be sufficient. The tags will need to be edited. However, either html or ePub may work well for them and save this extra step.
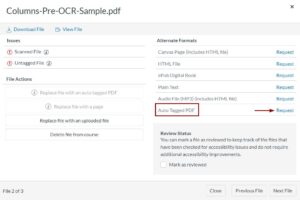
- Once the conversion is complete, select “Replace file with an auto tagged PDF” under File Actions. This will open a preview window.
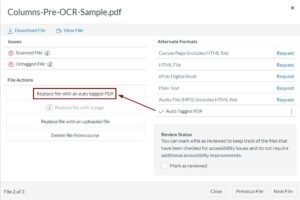
- At this point, you can download a copy to distribute outside of Canvas and use in other courses.
- Select “Replace File” to automatically update the file within your course to the more accessible format.
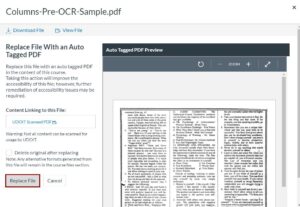
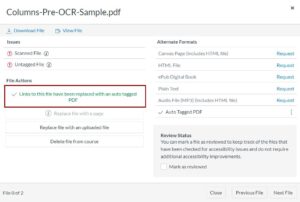
- You will receive a confirmation that the file has been replaced.
Check for Other Issues on the UFIXIT Tab
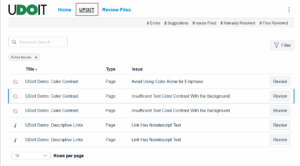
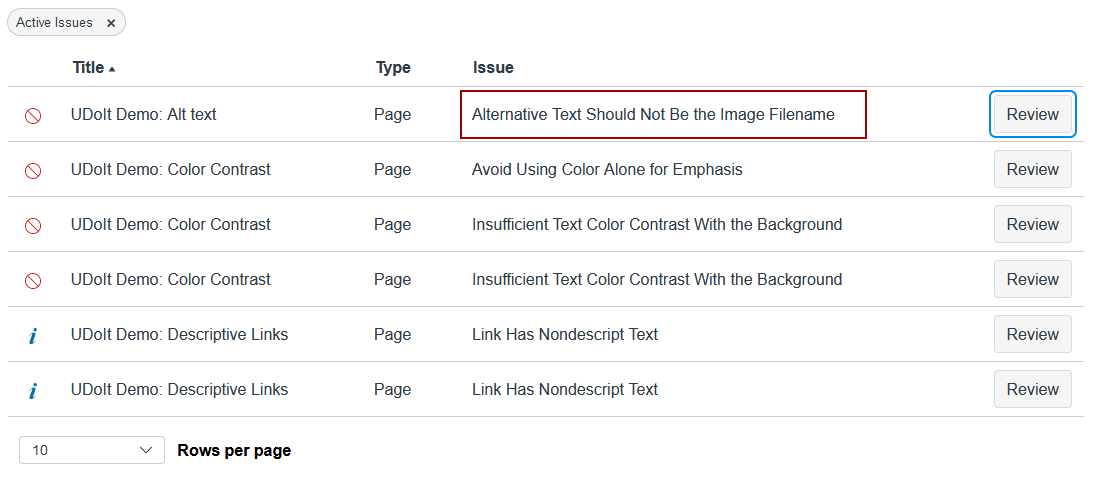
UDOIT can also help you fix issues within the course itself. The summary page lists issues outside of uploaded files. You can filter these under Ways to Get Started. The default filter is “Easiest to fix.”
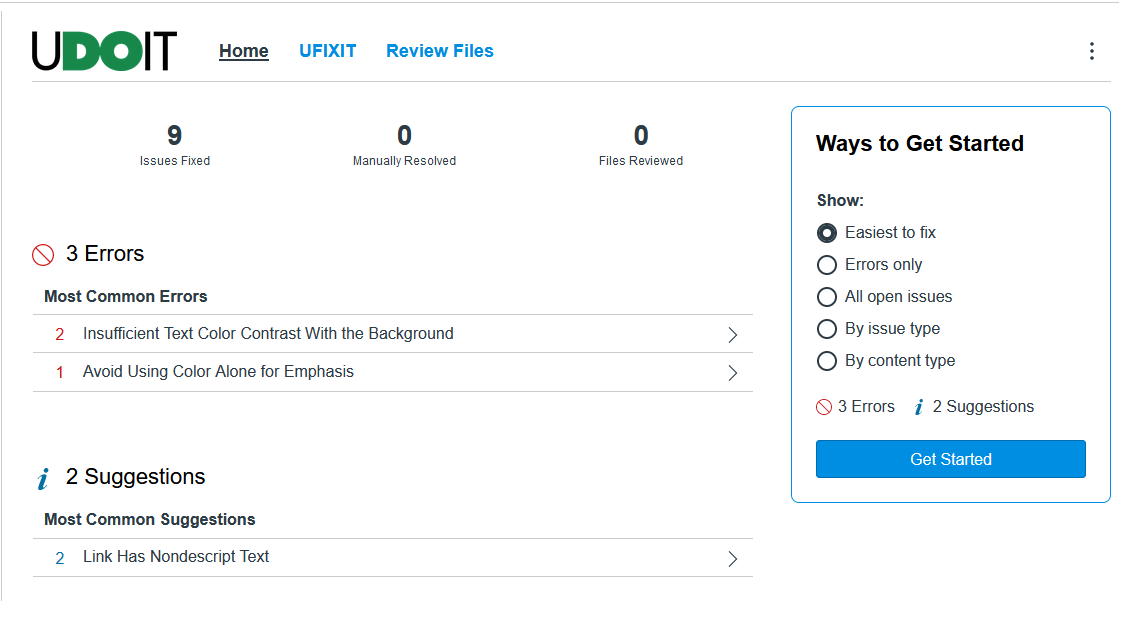
Click on the UFIXIT tab to resolve the issues. When you select Review next to an item, a pop-up window will open explaining the problem. Many issues can be fixed directly from within this window.
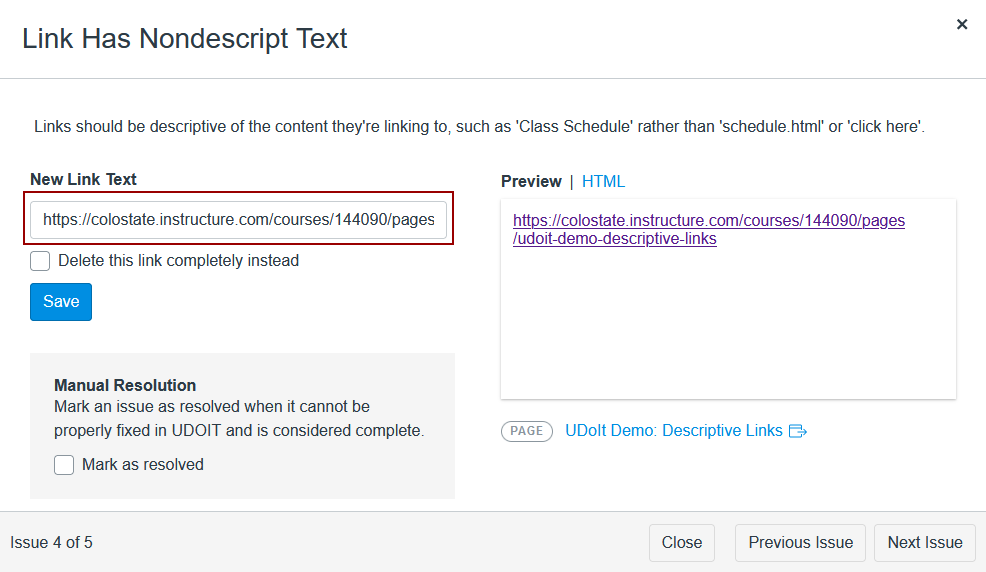
Descriptive Links
- On the UFIXIT tab, click on Review to fix a nondescriptive link.

- In the pop-up window, write your descriptive link text in the New Link Text box and save.
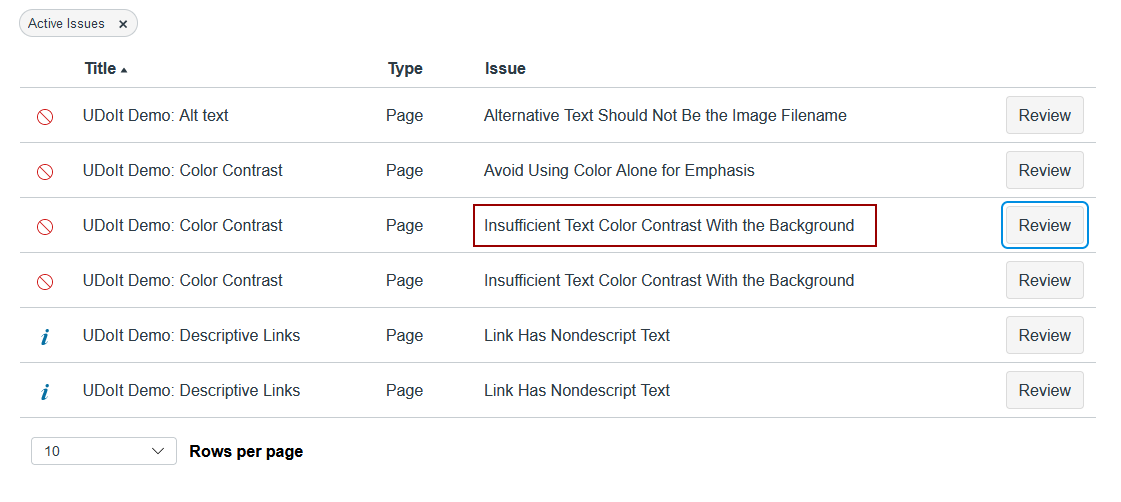
Color Contrast
In this example, the text has insufficient contrast with the background.
- On the UFIXIT tab, click on Review next to the error.
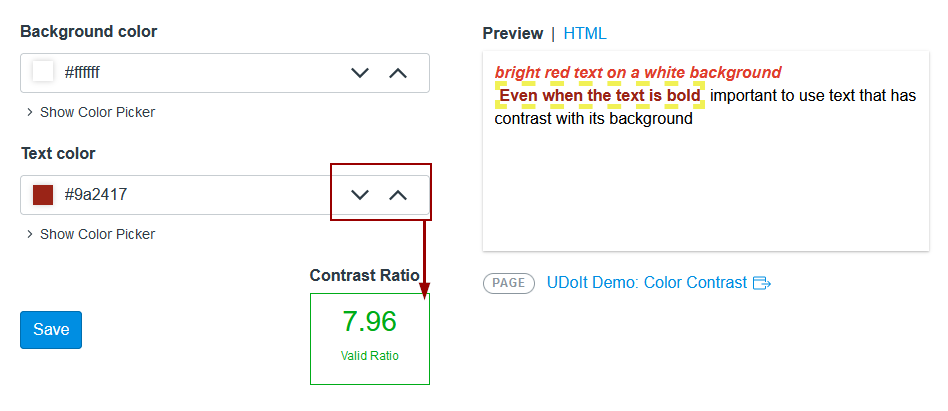
- In the contrast error window, you have the option to increase the contrast of the existing color or use a color picker to choose a new color.
- To increase the contrast of the existing color, click on the up or down arrow next to the background color or text color. Watch the Contrast Ratio output to see when the contrast becomes sufficient. Save the new colors.
Alternative Text
In this example, the alternative text of an image is the filename instead of descriptive alternative text.
- On the UFIXIT tab, click on Review next to the error.
- The preview shows you which image has the problem.
- Type your descriptive alternative text in the New Alt Text box and save.
